How to setup K3S cluster and NGINX Ingress Controller
Introduction
When setting up a Kubernetes environment for testing, K3s is an outstanding choice due to its lightweight architecture and ease of deployment. By default, K3s includes Traefik as its ingress controller, but this may not suit all users’ requirements or preferences.
In this post, I will guide you through installing a K3s cluster without Traefik and configuring the NGINX Ingress Controller instead. We will also generate a wildcard certificate using Active Directory Certificate Services (AD CS) to ensure secure communication by default in our ingress controller.
Prerequisites
To follow this tutorial, you will need:
- One Ubuntu 22.04 server with at least 1GB of RAM pre-configured
- Active Directory Cerficate Services (ADCS) in installed in a separated Windows box
Step 1 - Installing K3s without Traefik
In this step, you will install the latest version of K3s on the Ubuntu machine.
Install the K3s without Traefik using the following command:
1
sudo curl -sfL https://get.k3s.io | INSTALL_K3S_EXEC="--disable traefik" K3S_KUBECONFIG_MODE="644" sh -
This command downloads and runs a script to install K3s with specific configuration options.
Let’s break it down:
curl -sfL https://get.k3s.io: This part downloads the K3s installation script.-s: Silent mode-f: Fail silently on server errors-L: Follow redirects
|: Pipes the output of the curl commamnd to the next command.INSTALL_K3S_EXEC="--disable traefik": This sets an environment variable that will be used by the installation script. Basically it is telling K3s installer to disable Traefik.K3S_KUBECONFIG_MODE="644": The kubeconfig file is owned by root, and written with a default mode of 600. Changing the mode to 644 will allow it to be read by other unprivileged users on the host.sh -: This runs the downloaded script using the shell.
To know more about the supported flags access https://docs.k3s.io/cli/server.
You should see an output like below, which shows the steps performed by the installation script:

Next run the following command to check the k3s status:
1
sudo systemctl status k3s
The command will show the status as active (running): 
Confirm the cluster is up and running with the command:
1
kubectl cluster-info

Get Default Kubernetes Objects
1
kubectl get all -n kube-system
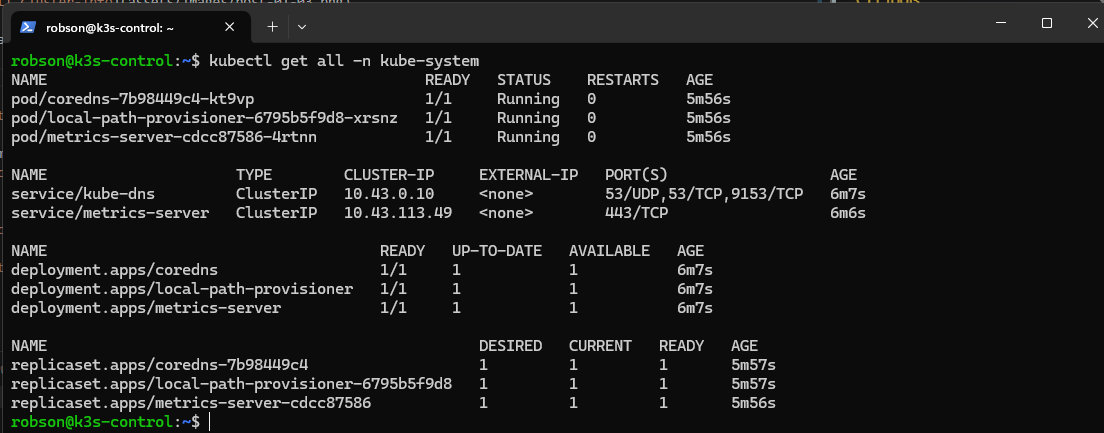
As you might have noticed, we did not need to perform any extra steps to access our cluster, simply running kubectl with was enough to get the cluster info and its objects.
This is because K3s comes bundled with its own version of kubectl, which automatically reads the Kubeconfig from the correct path /etc/rancher/k3s/k3s.yaml:

Step 2 - Install and configure Helm
There are two primary methods to install the NGINX Ingress Controller on a Kubernetes cluster:
- Using Kubernetes Manifests
- Via Helm, a package manager for Kubernetes
In this tutorial, we’ll focus on the second method, using Helm to install the NGINX Ingress Controller on our K3s cluster. It’s important to note that neither the NGINX Ingress Controller nor Helm come pre-installed with K3s. Both need to be manually installed and configured.
Lets first install Helm, and for that we will follow the instruction found on the official helm doc:
https://helm.sh/docs/intro/install/#from-script
Execute the following commands:
1
2
3
sudo curl -fsSL -o get_helm.sh https://raw.githubusercontent.com/helm/helm/main/scripts/get-helm-3
sudo chmod 700 get_helm.sh
sudo ./get_helm.sh
Installation output: 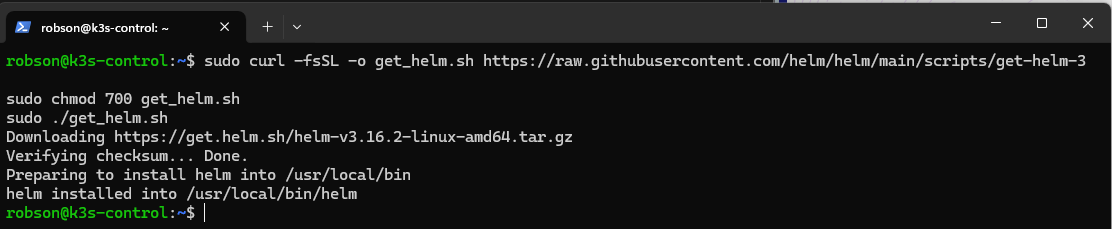
If we run now the command helm list -A we will get the error below: 
This is because, unlike kubectl, helm is not aware of the kubeconfig file stored at /etc/rancher/k3s/k3s.yaml which is used to grant access to our k3s cluster. We need to configure Helm with the correct Kubeconfig path manually.
This can be done by mutiple ways:
- Exporting the
KUBECONFIGenvironment variable1 2
export KUBECONFIG=/etc/rancher/k3s/k3s.yaml helm list -A

- Specifying the location of the kubeconfig file in the command:
1
2
unset KUBECONFIG
helm --kubeconfig /etc/rancher/k3s/k3s.yaml list -A

- Copying kubeconfig file to ~/.kube/config and setting the right permissions
1
2
3
4
5
mkdir ~/.kube
cp /etc/rancher/k3s/k3s.yaml ~/.kube/config
chown $USER:$USER ~/.kube/config
chmod 700 ~/.kube/config
helm list

By copying the Kubeconfig file to the default ~/.kube/config location allows Helm to automatically recognize it without needing to specify the path or set the KUBECONFIG environment variable each time. This is the method I normally use.